


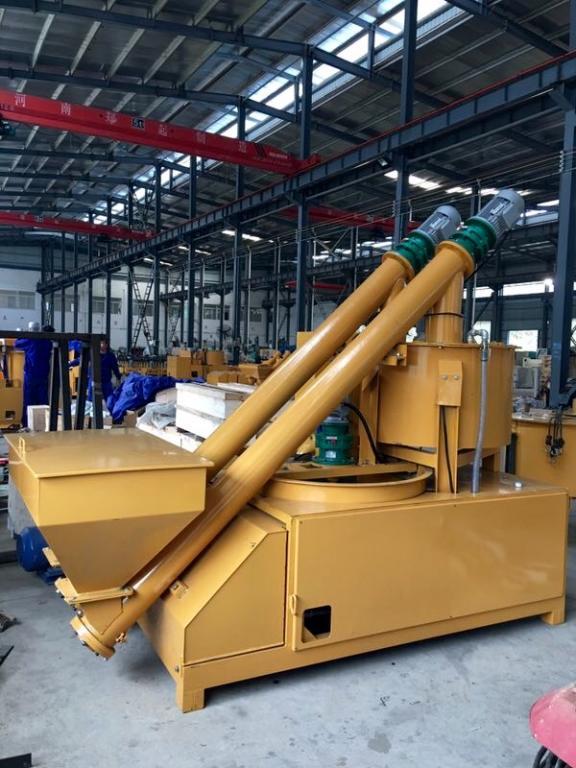
Railway 1 Towing 4 Intelligent Tensioning Equipment
Price:¥48500
Other Products

Description
Additional Information
Note: This manual may not match the existing equipment; please refer to the actual device for specifics. Changes may be made without prior notice.
I. Equipment Connection
The equipment connection is as shown in the figure.
II. Calibration Method
The calibration of the CNC oil pump is generally performed by supplying oil through a standard oil pump, with the CNC oil pump reading the pressure.
The calibration connection method is as shown in the figure.
Switch the CNC oil pump to standalone mode, then bring up the pressure reading screen.
Main unit: Click
Read the pressure from here.
Auxiliary unit:
Press the button to enter system operation.
Read the pressure from the current pressure column.
III. Tensioning Process
The basic steps for automatic tensioning are:
Input jack regression equation — Input tensioning process — Input beam number, channel number, tension force — Load parameters — Confirm connection and proceed with tensioning — Data export and computer operation.
(The jack regression equation and tensioning process are input once; as long as the jack regression equation and tensioning method remain unchanged, these steps need not be repeated in subsequent tensioning processes.)
1. Input Jack Regression Equation
Click to enter the input screen.
Fill in the corresponding main unit number, auxiliary unit number, jack number, jack model, etc., as instructed. Input the corresponding jack regression equation in the circled area. For example: P=0.0174F+0.8333, then coefficient a=0.0174, b=0.8333.
If the equation is given in the form F=57.471P-47.89, then coefficient a=1/57.471=0.0174, b=47.89/57.471=0.8333.
After entering the valid date, press the button to exit, or press the button to proceed to input the regression equations for jacks 3 and 4.
2. Input Tensioning Process
Click to enter the tensioning process setup screen.
As shown above, if the on-site tensioning process requires pausing for 40 seconds at 10% and 20% pressure while recording the jack extension, and holding at 100% pressure for 2 minutes while recording the jack extension, then calculate the actual elongation of the strand based on a unilateral retraction of 6 mm. Input the following parameters:
Input 10%
Input 20%
Input 100%
Input 40 seconds
Input 120 seconds (i.e., 2 minutes)
Input 6 mm
The remaining parameters can be set to factory defaults. For detailed settings, refer to Section V, Button Explanations.
After setting the tensioning process, press to return to the main interface, or press to directly enter the tension force setup screen.
3. Input Beam Number, Channel Number, Tension Force
Click to enter the tension force setup screen.
As shown above, fill in the corresponding beam number, channel number, anchor plate hole count, theoretical elongation, etc., according to the actual situation.
As shown above, this is for a 20m T-beam single-end final tensioning.
If the channel is for a 20m T-beam double-end final tensioning, then select as
After setting the parameters, click.
After confirming the parameters, you can click to directly enter the parameter loading screen for tensioning. Alternatively, click to proceed to other parameter settings.
For detailed settings, refer to Section V, Button Explanations.
Note: The beam number and channel number displayed in the tension force setup screen correspond to their tensioning records. Deleting or overwriting the information on this interface will delete or overwrite the corresponding tensioning records.
As shown above, under parameter sequence 2, beam number T1, channel number N1, if modified to beam number T2, channel number N2, and then click parameter confirmation, the following will pop up:
Prompting whether to overwrite the original tensioning record for beam number T1, channel number N1.
4. Parameter Loading, Parameter Confirmation
Click to enter the parameter loading screen.
After verifying that the beam number, channel number, tension force, tension pressure, elongation, etc., are correct, click
5. Connection Confirmation, Proceed with Tensioning
Before tensioning, test whether the communication between the main and auxiliary units is normal, check if the A2 communication indicator is flashing, or start/stop the motor to see if the auxiliary unit responds.
After confirming communication is normal, click.
5.1 Touchscreen Manual Tensioning (Using this method, the system can still automatically generate tensioning data)
If power failure, communication interruption, or other unexpected situations occur during tensioning, restart and enter the tensioning screen for manual control.
Click jack 1 and jack 2 to turn them bright green. After the main and auxiliary units are connected normally, start the oil pump. Then click and compare the actual pressure with the target pressure. When the pressure reaches 100%, stop oil supply, record data, and automatically retract.
5.2 Control Panel Manual Tensioning
Start the motor, bring up the pressure reading screen, hold down the oil supply key on the control panel to tension, and release the key when the pressure is reached. (Same as manual tensioning method.)
Note: During manual operation, the system's pressure and displacement safety settings are not active.
Note: The operation methods for CZB2×2-600, CZB4-600, CZB2×2-600A, and CZB4×4-600A are the same, but the screens may differ.
6. Data Upload and Computer Operation
6.1 Computer and Main Unit Connection as Shown Below
Power on, click the wireless network icon in the taskbar, click "View available wireless networks," find the wireless network starting with LM, click to connect (password LM3511867). (If the wireless network fails to connect automatically by obtaining an IP, try manually entering the IP address.)
)
After connecting to the wireless network, click the "Kingview" icon on the desktop, select "Deweim Tensioning Machine," then click the "Run" icon in the upper right corner to enter the monitoring screen.
This interface directly displays the actual tensioning situation.
Click the circled area to enter the data query interface.
Input the bridge number, click bridge query to query the corresponding tensioning channels on the same beam.
Click data export to export the data to an Excel spreadsheet.
6.2 Data Upload
First, connect the computer to the main unit as described in 6.1, then click
Find the beam number and channel number for which data needs to be uploaded.
Click
Fill in the start and end sequence numbers for the data to be uploaded, then click.
IV. Special Condition Functions
1. Displacement and Pressure Comparison Control
When the tensioning pressure reaches 100% and the elongation is less than the theoretical calculation range, the following will pop up:
Prompting whether to over-tension. If manual over-tensioning is required, follow the method in the previous section 5.2, Control Panel Manual Tensioning.
When the elongation exceeds the theoretical calculation range and the tension force has not reached 100%, the following screen will pop up, and tensioning will stop.
Click to continue tensioning to 100% pressure.
Click to directly retract the jack and save the record.
2. Restart During Tensioning
If power failure or communication interruption occurs during tensioning, requiring a system restart, the system will prompt after restarting:
Click to enter the tensioning interface and continue tensioning.
3. No-Load Testing
Click to enter the no-load testing screen.
Select the jack to be tested, such as
Enter the total test displacement.
Enter
Enter
Power on, click automatic testing to perform no-load testing.
Note: During no-load testing, the jack must be empty; testing under load may damage the equipment.
V. Button Explanations
The system divides the tensioning process into 6 pause points. Fill in according to the actual tensioning situation; set unused pause points to 0. However, the initial tensioning and first-stage tensioning must be filled in, and final tensioning must be set to 100%.
This is the protection setting to prevent the jack from exceeding its stroke. If the jack stroke is 200, set this item to 195. The system will stop for protection when the jack extends to 195.
This is the pressure protection setting for the hydraulic system. The system will alarm and stop if the pressure exceeds this value.
This is the pause time when the system reaches the initial tensioning pressure, first-stage, second-stage, third-stage, and fourth-stage tensioning pressures. If no percentage is set between the second and fourth stages, the system will skip directly to supplying oil to 100% pressure.
This is the holding time at 100% tensioning pressure.
This is the time limit for jack retraction stop. When the jack retracts and reaches this time, the system will stop and prompt regardless of whether the jack has fully retracted.
When tensioning long-span beams, multiple tensioning cycles may be required due to limited jack stroke. This setting controls the extension amount for the first and second tensioning cycles. It only takes effect when selected.
This is the retraction amount of a single jack, mainly used to calculate strand elongation and can be set arbitrarily.
This is the safety pressure setting during tensioning. The system will alarm and stop when the tensioning pressure reaches this value to prevent strand breakage.
Select to have the system tension to 100% pressure, then directly tension to the set tensioning pressure.
Select to have the system tension to 100% pressure, then judge based on elongation whether to prompt for over-tensioning, with manual click to proceed. If the strand elongation is within 6% of the theoretical elongation after reaching 100% pressure, the jack will directly retract without prompting for over-tensioning.
Marks the storage location of the set bridge parameters and tensioning records on the touchscreen. (Acts like a page number.)
Refers to the number of channels in a beam.
Calculate the elongation according to the drawings and enter it.
Based on ±6% of the calculated elongation, the system directly calculates the qualified strand elongation range.
Indicates that the tensioning process is completed in one cycle from 0-100%, with possible pauses for pressure holding.
Indicates that the tensioning process is completed in two cycles: from 0-50% (configurable), then jack retraction, followed by another cycle from 50%-100%.
Indicates that the jack completes tensioning in multiple cycles. Generally used for tensioning long-span beams.
Indicates tensioning with only the main unit.
Indicates tensioning with jack 1 and jack 2.
Indicates simultaneous tensioning of two channels with jack 1 and jack 2, and jack 3 and jack 4.
Indicates that the current parameters are for tensioning with jack 1 and jack 2.
Indicates that the current parameters are for tensioning with jack 3 and jack 4; only appears when selected.
This is the manual tensioning or over-tensioning completion confirmation key. Clicking this key will record the current pressure and displacement, then directly retract. Therefore, ensure the required tension force has been reached before clicking this key.
VI. Troubleshooting
Fault Phenomenon Cause Solution
Fan running, screen not lit, or motor starting weakly Power phase missing Check power supply
Auxiliary unit unresponsive, or auxiliary motor stops during tensioning Poor communication between main and auxiliary units 1. Check if antennas are connected properly, any missing antennas.
2. Remove the router (see Figure 1) and check if the router power is loose.
3. Use a network cable for direct connection (see Figure 2), and remove the router antenna.
Displacement value inaccurate or jumping erratically Displacement sensor or displacement line shorted, disconnected, or loose 1. Check if connectors are loose or wet.
2. Replace the displacement line to identify the problematic part.
3. Replace the displacement sensor.
Jack not moving during tensioning or retraction Determine
1. Program issue (see Figure 3)
2. Electrical issue (see Figure 4)
3. Hardware issue
Program issue Complete using touchscreen manual tensioning.
Electrical issue Replace electrical components.
Hardware issue Clean solenoid valve.
Check pump head.
Figure 1
Remove the screws to take out the router. After removing the router, use a network cable to connect the two router network ports, keeping the original network cable.
Figure 2
If the system freezes and the jack doesn't move during tensioning, first check the "oil supply" and "oil return" indicators in the circled area of the tensioning monitoring screen. If the indicators are dim gray like, it indicates a system issue. Check if the target pressures for jack 1 and jack 2 are the same and if communication is disconnected.
If the indicators are bright like, the system is fine. Then check Figure 3 below.
When the oil supply or return indicator is bright, observe if the two indicators on the solenoid valve are lit.
If the solenoid valve indicators are not lit, it is an electrical component issue; replace the corresponding electrical components.
If the solenoid valve indicators are lit, it is a mechanical component issue; repair the solenoid valve or pump head.
VII. Precautions
1. Before tensioning, ensure oil pipes and displacement lines are connected correctly, and main and auxiliary unit communication is normal.
2. Before tensioning, confirm that the regression equation is correct. Incorrect regression equations can cause tensioning accidents.
3. Always verify that the tensioning parameters set are for the current tensioning to prevent over-tensioning.
4. After parameter setup, run the pump idle for 2 minutes to remove air, then proceed with operation.
5. During tensioning, ensure strand group 1 corresponds to jack 1 and jack 3 for tensioning, and strand group 2 corresponds to jack 3 and jack 4 for tensioning.
6. Do not stand in front of the jack during tensioning.
7. If modifying parameters, ensure the original tensioning records no longer need saving, otherwise they will be overwritten.
8. Install as few other software as possible on the monitoring computer to avoid conflicts with the monitoring software.
9. Ensure waterproofing and moisture prevention to avoid electrical short circuits.
10. This pump must use #46 wear-resistant hydraulic oil.
VIII. Oil Pump Technical Parameters
1 Pump 1 Jack
Rated pressure 55 MPa Rated power 3 kW
Rated flow 2 L/min Operating temperature -5 to 65°C
Total tank volume 70 L Effective tank volume 40 L
Number of connected jacks 1 Weight kg
Dimensions 760*590*950 mm
1 Pump 2 Jacks
Rated pressure 55 MPa 55 MPa Rated power 3 kW 4 kW
Rated flow 2*2 L/min 3*2 L/min Operating temperature -5 to 65°C -5 to 65°C
Total tank volume 70 L 70 L Effective tank volume 40 L 40 L
Number of connected jacks 2 units 2 units Weight 135 kg 150 kg
Dimensions 760*590*950 mm
IX. Packing List
1 Pump 1 Jack (Main Unit)
No. Name Quantity Remarks
1 Main pump 1
2 Monitoring computer 1 Optional
3 Displacement cable 3
4 Power cable 1
5 Certificate of conformity 2
6 Manual 1
7 Lifting rope 1
1 Pump 1 Jack (Auxiliary Unit)
No. Name Quantity Remarks
1 Main pump 1
2 Power cable 1
3 Lifting rope 1
1 Pump 2 Jacks (Main Unit)
No. Name Quantity Remarks
1 Main pump 1
2 Monitoring computer 1 Optional
3 Displacement cable 5
4 Power cable 1
5 Certificate of conformity 2
6 Manual 1
7 Lifting rope 1
1 Pump 2 Jacks (Auxiliary Unit)
No. Name Quantity Remarks
1 Main pump 1
2 Power cable 1
3 Lifting rope 1
X. Warranty Description
1. Major electrical components and modules are warranted for 1 year.
Including: operation panel, PLC, AD module, network module.
2. Major hydraulic components are warranted for half a year.
Including: hydraulic valve, pump head.
3. Other components are warranted for 3 months.
Including: displacement sensor device. Components damaged by water, moisture, external force, or unauthorized disassembly are not covered by warranty.
| Industry Category | Chemicals/Chemical Intermediates/Intermediate Compounds |
|---|---|
| Product Category | |
| Brand: | DVM |
| Spec: | CZB2X2-600A |
| Stock: | |
| Origin: | China / Jiangxi / Nanchangshi |


